With File Manager in cPanel, you can copy, move, organize, delete and change permissions for your files and folders.
File Manager is part of cPanel, which you can access through your Namecheap dashboard. When you open File Manager, you’ll see a lot of files — both default and custom ones. The default files and folders should stay intact to keep your hosting service functioning as it should.
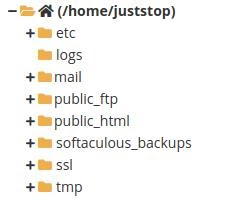
Here is the list of some default files and folders:
etc is a directory that can hold configuration files and is subdivided by domains in the account.
The logs directory contains Apache access and error logs for the account. The older logs are zipped up in .gz format on a monthly basis.
The next folder is where all your mails are stored. It includes subdirectories for each domain and email account with further subdirectories for sent/drafts/etc.
public_ftp contains files to be accessible via anonymous FTP.
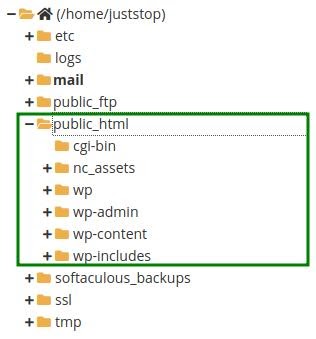
public_html is the most widely used directory. It is the root directory of the main domain. Addon domains are usually sub directories of the Home folder, but if you set a subdirectory of this folder to be the root directory for an addon domain, you will see its subdirectory under public_html as well correspondingly. File and folders placed in this directory are publicly accessible from any web browser by default.
If you want to change the root directory for your main domain from public_html to public_html/subfolder, follow these instructions.
The document root for addon domains can be updated as described here.
Softaculous_backups is a directory where all backups made in the Softaculous interface are stored.
The ssl directory will store SSL certificates, CSRs, and keys.
Session files or other temporary files can go into the tmp directory. It may be emptied periodically by the system.
Having enabled the hidden files, we may see a few more default folders. These files are hidden because the system needs them not to be edited by human hands.
.cagefs is for the virtualized file system that keeps this cPanel account and the others on the server private from each other, in so-called “cage”.
.cl.selector stores a few options for the cPanel account, like the PHP implementation and a list of .htaccess file locations.
.cpanel stores configurations and caches for cPanel. .cphorde stores configurations for the Horde webmail client.
.htpasswds will store hashed passwords for directories protected by the Directory Privacy feature.
.nc_plugin stores the configurations made in the Namecheap SSL plugin.
.pki includes the configuration of a technology for authenticating users and devices in the digital world.
.softaculous stores information for the Softaculous apps installer available for all shared server users by default.
.spamassassin stores the preferences for spam filtering of incoming emails.
.trash stores files deleted through the cPanel file manager.
.htaccess is a directory-level configuration file supported by the Apache web server. It is used to alter web server configuration (enable or disable additional features) for the specific account without changing global server settings. This file is not a default one, but it is required for most websites, so you may find more information about working with it here.
Tips for navigating within File Manager
Accessing the File Manager for the first time, you will be taken to the Home folder. If you want to change the directory that will be opened by default, you may do it in the Settings section as described here.
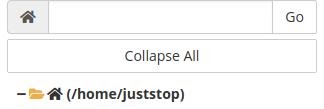
The path to this (or current) directory is shown in the upper left corner. The Home icon represents the home/your cPanel username.
Below is the folders tree.
To search for a file or folder, use the Search bar on the top bar menu of the File Manager window. You can choose to search within all your files, public_html or current directory. In the next input box, type the file name and click go to search for a file.
In the Search Results pop-up window, choose the path to the required file and double-click on it to open the corresponding directory.
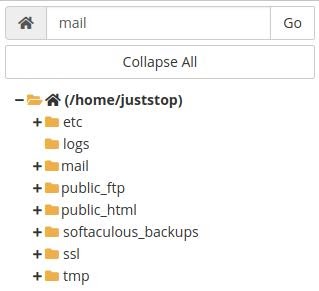
It’s also possible to navigate to a folder by entering its name in the navigation address bar, and you will be forwarded to that directory. For example, to navigate to the mail directory, you need to type in “mail” and click Go.
To see your current location, you may check the folders tree. The current location will be highlighted in bolds. The path will be also mentioned besides the Home icon in the left top corner. These parts match. You may copy the path from the address bar when you need to specify the exact location while moving or copying files, for example.
Another way to access the directory you wish is to check the folders tree and click on the folder you need, or expand its content and then choose the corresponding directory.
You may also find the directory you want to access in the main window. The main window will show the list of files and folders, and you may use this window to navigate by double-clicking the relevant directory.

This window also contains the name of files and folders, their size, the date when they were last modified, the type of file or directory, and the permissions. The permissions graph is clickable. We also have a separate tutorial on how to edit permissions.
By default, folders appear first, then the files are listed. Click the Name graph, to sort the files and folders in the alphabetic order. If you click once again, the order will be from Z to A. To set the default order, select the current directory in the folders tree or click Go next to the Home icon.
If you need to go back to the Home directory, you may remove the path from the left search bar or simply click Home in the upper menu.
When you navigate to some folder, you may go Up One Level. Note, the Home directory is the ground level, so there is no chance to go up from this location.
The options to go back and forward work like in an ordinary browser to lead you to the directory where you were last time or move forward correspondingly.
If you’ve uploaded a file but cannot see it, you may want to reload the page.
When you need to copy, move or delete all content within a directory, you may Select all. If you’re unhappy with your choice, just Unselect all. To select a few chosen files and folders, hold the Ctrl button and select the items you need left clicking.
If you need to easily and quickly navigate to the Trash folder, or empty your trash bin you may do it here. You may also empty your trash bin with the help of the Empty Trash button.


